
MCP Integration BETA
MCP (Model Context Protocol) lets compatible AI assistants securely connect to WPAutoBlog. After connecting, you can ask your assistant to view your sites and articles, check your available generation options, and create or schedule articles using natural-language instructions.
One WPAutoBlog MCP server can be used by compatible clients; you do not need a separate WPAutoBlog integration for each one. Connecting through MCP does not change your WPAutoBlog plan limits or feature availability. Articles created through MCP use the same credits, generation options, and account entitlements as articles created through WPAutoBlog. MCP does not unlock features unavailable to your account.
On this page
- Quick Start
- Connect to ChatGPT Desktop
- Connect to VS Code / GitHub Copilot
- Other MCP clients
- Available tools
- Generation options
- Credits and scheduling
- Example prompts
- Authentication and security
- Beta notes and troubleshooting
- Disconnecting access
Quick Start
Add this server URL to a compatible MCP client:
- Add the WPAutoBlog MCP server to a compatible client.
- The client opens WPAutoBlog authentication.
- Sign in to your WPAutoBlog account if asked.
- Review and approve the requested access.
- Return to the AI client.
- The client can discover and use the WPAutoBlog MCP tools allowed by your approval.
Connect WPAutoBlog to ChatGPT TESTED WITH CHATGPT DESKTOP
This setup flow has been tested with the ChatGPT Desktop app. ChatGPT labels and menus can change between versions, so the exact wording may differ.
- Open ChatGPT Desktop.
- Open Settings.
- Find the area for Plugins or MCP servers, depending on your version.
- Add or connect the WPAutoBlog MCP integration/server.
- Enter the WPAutoBlog MCP server URL shown above.
- Select Authenticate or the equivalent option when prompted.
- WPAutoBlog opens in your browser. Sign in if necessary, then review and approve the authorization request.
- After authorization, return to ChatGPT and start using WPAutoBlog with natural-language prompts.
Connect WPAutoBlog to VS Code / GitHub Copilot TESTED
This flow has been tested in VS Code with GitHub Copilot.
- Open VS Code.
- Open the Command Palette with
Ctrl + Shift + P. - Select MCP: Add Server.
- Choose HTTP for a remote HTTP MCP server.
- Enter
https://wpautoblog.com/mcp-http. - Use a server ID such as
wpautoblog. - Choose Global if you want WPAutoBlog available across VS Code workspaces.
- Complete WPAutoBlog authentication when prompted.
The resulting configuration is equivalent to:
Open Copilot Chat and try:
Copilot discovered and successfully executed the list_sites MCP tool in our verification.
Other MCP clients
Customers can try WPAutoBlog with other remote MCP clients using the same server URL:
Client compatibility depends on support for compatible remote MCP and OAuth functionality. Client-specific setup steps have not been verified here, so follow the client's own instructions and do not assume every MCP client is supported.
Available MCP tools
The authenticated account and approved permissions determine which information and actions are available.
| Tool | What it does | Example request |
|---|---|---|
ping | Checks basic MCP connectivity and server health. | Ask the client to check whether WPAutoBlog MCP is working. |
list_sites | Returns connected WordPress sites for the authenticated WPAutoBlog account. | Show my WPAutoBlog sites. |
list_articles | Returns recent articles belonging to the authenticated account. | Show my recent WPAutoBlog articles. |
get_article | Returns details for a specific article belonging to the authenticated account. | Show me the details of WPAutoBlog article ID 123456. |
get_generation_options | Lists generation defaults and capabilities available to the account, with article-credit information where exposed. | What generation options can I use when creating a WPAutoBlog article? |
create_article | Queues an article through WPAutoBlog using the selected site and the account's available rules and options. | Ask the assistant to create or schedule an article using one of the examples below. |
Generation options
create_article exposes these options. Defaults are applied when you do not specify an option; availability can depend on your WPAutoBlog account.
| Option | What it controls | Default or availability |
|---|---|---|
| Additional images | Include additional article images. | On by default. |
| Tables | Include a generated table. | On by default. |
| FAQs | Append FAQs to the article. | Off by default. |
| Internal links | Add links from the selected site's sitemap. | Off by default; links depend on available sitemap content. |
| YouTube video | Include a YouTube video when available. | Off by default; a video may not be available for every topic. |
| Web Research | Use live web research. | Off by default; extra credits apply. The account's current cost is reported in generation options. |
| Listicle | Generate listicle-oriented content. | Off by default; available only for some accounts. |
| AI-generated images | Use AI-generated images. | Off by default; available only for some accounts. |
| Image motif | Optional subject or motif for images. | Optional text. |
| Custom writing style | Optional writing instruction for this article. | Does not change your account's saved preference. |
| Language | Use an editor-supported language. | Defaults to your WPAutoBlog account language. |
| Scheduling | Queue now or set a future date and time. | Omit the scheduled time to queue immediately; specify the date, time, and timezone when scheduling for later. |
Credits and scheduling
get_generation_options for your account's current options and cost information.Scheduling articles
You can specify the date, time, and timezone naturally in your prompt. For best results, include a timezone whenever you specify a scheduling time. Compatible AI clients such as ChatGPT can interpret the requested timezone and send the scheduling value required by WPAutoBlog. Natural-language scheduling examples have been tested with ChatGPT Desktop; other client behavior may vary.
create_article directly must send scheduled_at as an RFC 3339 timestamp containing Z or a numeric UTC offset. This is a structured MCP tool argument, not something an ordinary user needs to type into a natural-language prompt.
To queue an article for now, ask the AI client to create or schedule it immediately.
Example prompts
Copy a prompt into your connected AI client and adjust the topic, site, and options to suit your needs.
Sites
Articles
Generation options
Create a standard article
Web Research and FAQs
Future scheduling
Tables and additional images
Internal links and YouTube
Account-dependent generation features
Writing style and image motif
Language
Tested with ChatGPT
The major workflows and examples in this guide have been exercised against the production WPAutoBlog MCP integration using ChatGPT Desktop. Verification included:
- Listing connected sites and recent articles;
- Retrieving an article and generation options;
- Creating a standard article and one with Web Research;
- Enabling FAQs and checking that the expected credits were deducted;
- Immediate generation queueing and future UTC scheduling.
Basic tool discovery and execution were also independently tested with VS Code and GitHub Copilot.
Authentication and security
- WPAutoBlog uses OAuth authorization. Sign in with your WPAutoBlog account and review the requested permissions.
- Do not give your WPAutoBlog password to the AI assistant. Sign in only on the WPAutoBlog authentication page opened by the client.
- MCP actions run for the WPAutoBlog user who authenticated.
- Your existing account permissions, plan entitlements, credits, and generation rules continue to apply.
- The MCP client receives access limited to the permissions approved in the authorization process.
The customer-readable permissions currently used are:
| Permission | Meaning |
|---|---|
sites:read | View connected WordPress sites. |
articles:read | View article information and generated content when available. |
articles:write | Create and schedule articles. |
Compatible modern clients can complete authentication through the OAuth flow when connecting.
Beta notes and troubleshooting
- Not every WPAutoBlog web-interface feature is exposed through MCP yet.
- Setup steps and labels differ between AI clients.
- Some generation options depend on your WPAutoBlog account.
- Client compatibility can vary; support is not guaranteed for every MCP client.
- MCP Beta access is available to AppSumo Tier 7+ users and eligible WPAutoBlog subscription accounts.
Team access
Authentication does not open
- Confirm the MCP URL is exactly
https://wpautoblog.com/mcp-http. - Check that your client supports remote HTTP MCP servers and OAuth.
Authentication succeeds but tools do not appear
- Reconnect or restart the MCP server in the client.
- Start a new AI chat/session if needed.
- Verify that the WPAutoBlog server is enabled in the client.
A generation feature is unavailable
Some options depend on your WPAutoBlog account. Ask:
Insufficient credits
MCP uses your normal WPAutoBlog credit balance and plan limits. You may need sufficient credits before creating an article.
The scheduled time is wrong
Include the timezone in your natural-language prompt, such as 10:00 AM IST or 10:00 AM UTC. ChatGPT Desktop has been tested with these prompts; compatible AI clients interpret the requested timezone and provide the structured scheduling value to WPAutoBlog.
Still having trouble?
Contact WPAutoBlog support and include the MCP client name and the error shown.
Disconnecting or revoking access
There is currently no customer-facing WPAutoBlog page for managing or revoking MCP authorizations. To stop using MCP, remove or disable the WPAutoBlog server in your AI/MCP client. If you need server-side access revoked, contact WPAutoBlog support and request revocation for your account.
How to connect your WordPress blog
Use the standard connection for all normal WordPress sites. WPAutoBlog verifies authenticated access to the WordPress posts REST endpoint before marking the connection as usable.
- Enter your WordPress site URL, wp-admin URL, or wp-json URL. Root installs such as
https://example.comand subdirectory installs such ashttps://example.com/blogare supported. - The WordPress REST API must be enabled and the WordPress user you authorize must be permitted to create posts.
- The standard flow uses WordPress Application Password authorization. Sign in only on your WordPress website; WPAutoBlog never asks you to enter your normal WordPress password in its connection form.
- If a firewall, WAF, or security plugin blocks requests, allow WordPress REST API access. For an IP allowlist, allow 159.203.96.206.
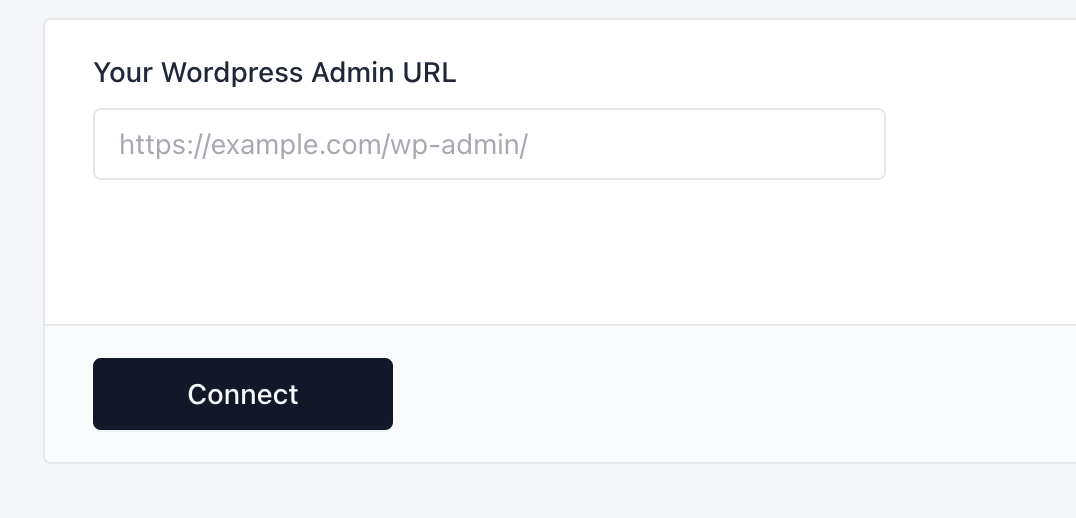
Enter your website URL and click Connect.
wp-login.php. You may enter the site URL, wp-admin, or wp-json; WPAutoBlog preserves a valid WordPress subdirectory.
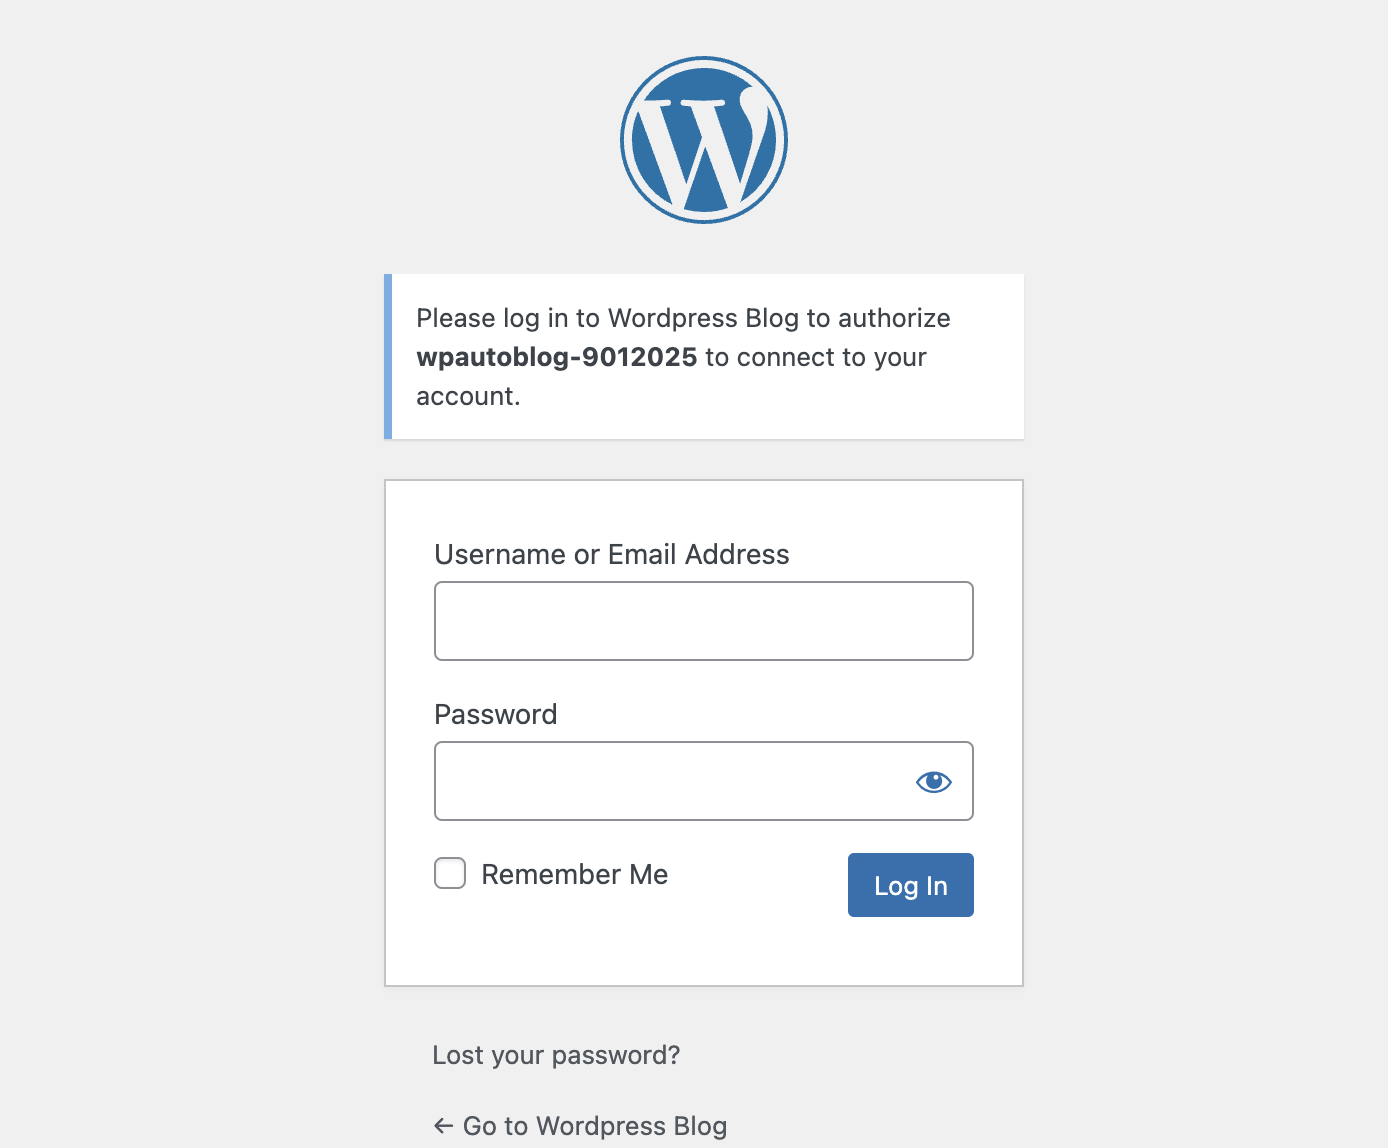
WPAutoBlog opens the WordPress authorization page. Log in to WordPress if requested.
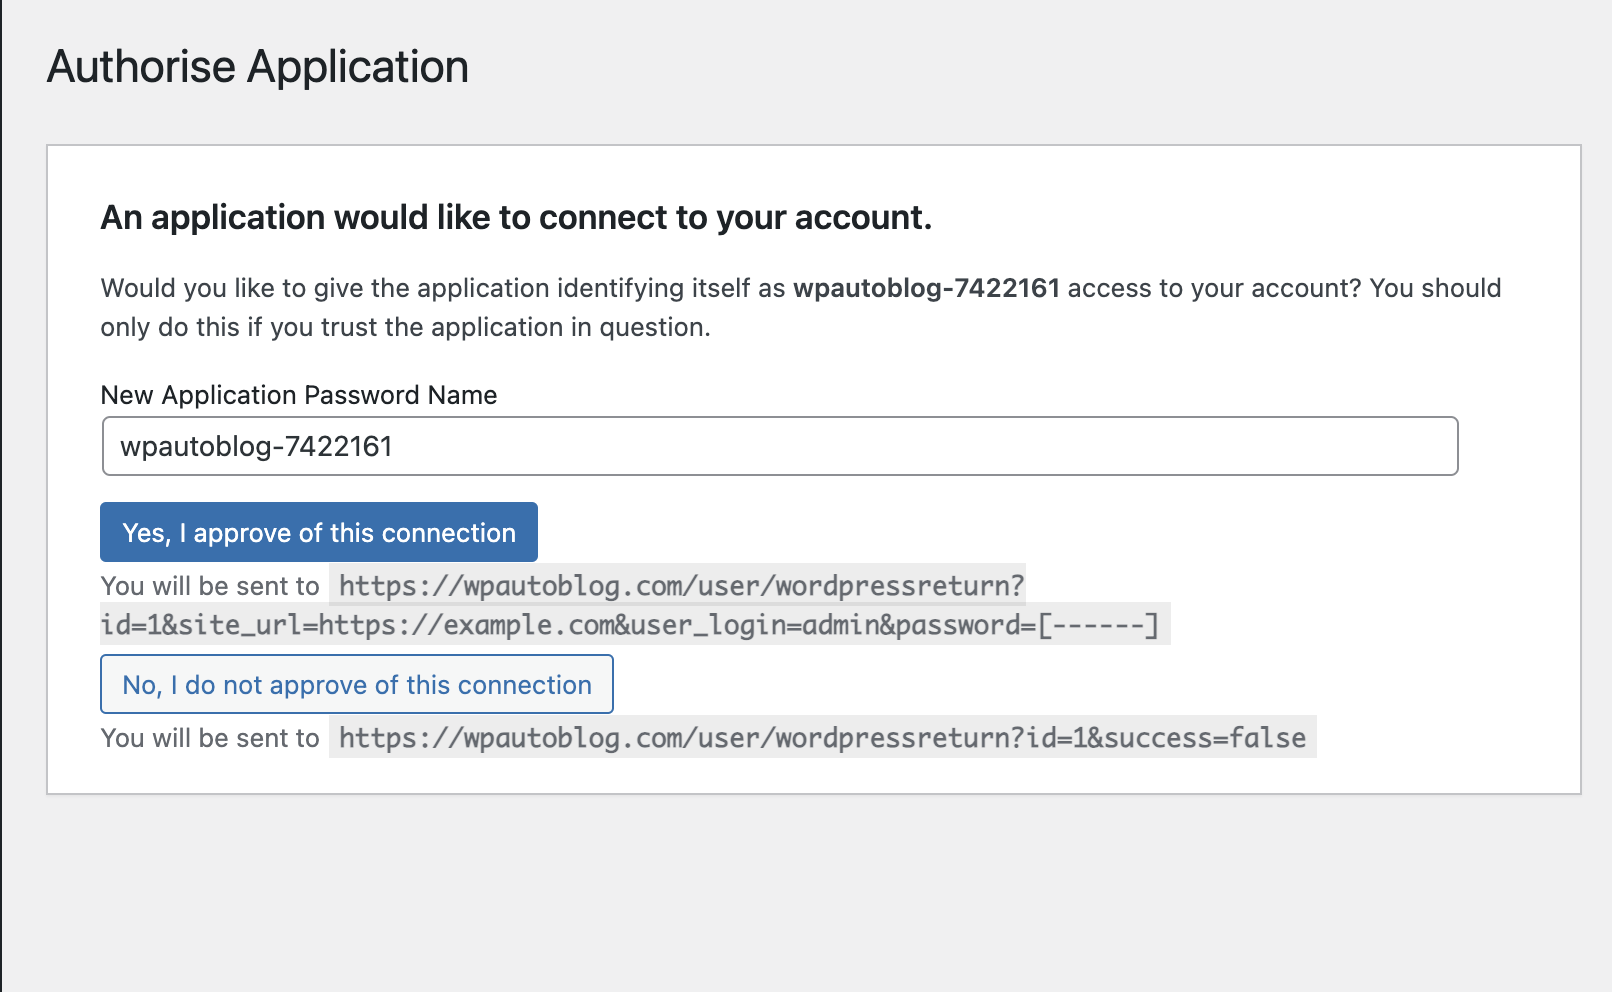
Once you are logged in, confirm the application access.
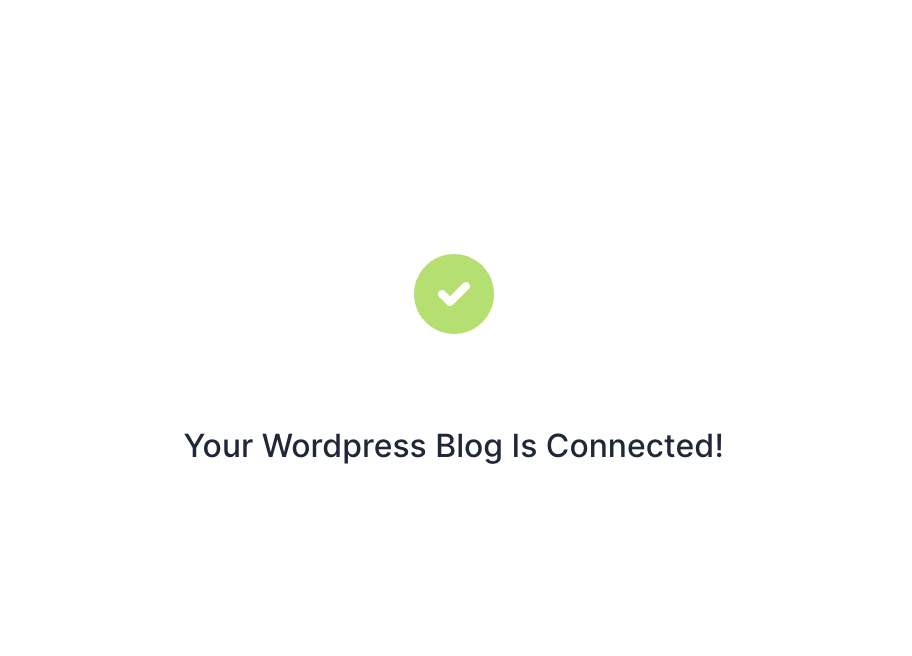
You will then be redirected back to WPAutoBlog and see the success message.
Manual connection with an Application Password
Use this fallback only if the normal WordPress authorization process does not complete.
- In WordPress, use a user who can create and publish posts, or create a dedicated user for WPAutoBlog.
- Go to Users → Profile → Application Passwords.
- Generate a new Application Password for WPAutoBlog and copy it.
- Remove any spaces WordPress displays in the generated password.
- In WPAutoBlog, open Websites and click Application Password for the unverified website.
- Enter the WordPress username and generated Application Password, then complete the connection.
Supported languages
Pabbly Connect integration
WPAutoBlog can automatically send your published article data to Pabbly Connect using webhooks. You can then use Pabbly to pass this data to Google Sheets, Google Docs, Notion, and thousands of other supported apps.
Step 1 — Create a workflow in Pabbly Connect
- Head over to Pabbly and log in to your account.
- Select Pabbly Connect from the list of products.
- Click Create Workflow and create a new workflow.
- Inside the workflow, click Add Trigger.
- Select Webhook by Pabbly from the apps menu.
- For the App Event, select Catch Webhook (Preferred).
- Click Connect.
Pabbly will now display a unique webhook URL for your workflow. Copy this URL. You will need it in the next step.
Step 2 — Connect Pabbly to WPAutoBlog
- Log in to your WPAutoBlog account.
- Go to the Accounts page.
- Find the Webhook URL field.
- Paste the webhook URL you copied from Pabbly.
- Save your changes.
Your Pabbly webhook is now connected to WPAutoBlog.
Step 3 — Capture your first webhook response
Before creating your test article, return to Pabbly Connect and make sure Webhook by Pabbly is waiting for a webhook response.
If it is not currently waiting, click Capture Webhook Response. Leave Pabbly waiting for the response while you create an article in WPAutoBlog.
Step 4 — Create an article and export it to your webhook
- Go to Post Scheduler in WPAutoBlog.
- Enter the keyword or topic for your article.
- From the available options, enable Export to Webhook.
- Continue with creating and scheduling your article as usual.
Once the article has been generated and successfully published, WPAutoBlog will send its article data to your configured webhook.
Give WPAutoBlog a little time to process the article, then return to Pabbly. You should see that Webhook by Pabbly has captured the response from WPAutoBlog.
Data sent to Pabbly
When an article is exported to your webhook, WPAutoBlog sends information about the published article that you can use in subsequent Pabbly workflow steps.
| Field | Description |
|---|---|
event |
Event name, currently article.published. |
domain |
The WordPress website/domain where the article was published. |
article.title |
The published article title. |
article.status |
The WordPress article status, for example publish. |
article.url |
The public URL of the published article. |
article.published_at |
The publication date and time returned by WordPress. |
article.featured_image_url |
The public URL of the article's featured image when available. |
article.body |
The HTML body of the published article. |
Example payload:
Step 5 — Send article data to Google Sheets
Once Pabbly has captured your WPAutoBlog webhook response, you can send that information to another app. In this example, we'll automatically add each published article to Google Sheets.
Create your spreadsheet
Create a Google Sheet and add the column headings for the article information you want to save. For example:
- Title
- Status
- Article URL
- Published At
- Featured Image
- Domain
Add Google Sheets to your Pabbly workflow
- Return to your workflow in Pabbly Connect.
- Hover over the Webhook by Pabbly step and click the plus (+) icon to add another app.
- Select Google Sheets.
- Choose Add New Row as the App Event.
- Click Connect.
- Create a new Google Sheets connection or select an existing connection, then save it.
- Select the spreadsheet you created earlier.
Pabbly will automatically retrieve the column headings from your Google Sheet.
Map your WPAutoBlog data
Map each Google Sheets column to the corresponding value captured by the webhook. You can press the forward slash (/) while mapping a field to view the available webhook response data.
For example, your mapping could look like this:
| Google Sheets column | WPAutoBlog webhook data |
|---|---|
| Title | article.title |
| Status | article.status |
| Article URL | article.url |
| Published At | article.published_at |
| Featured Image | article.featured_image_url |
| Domain | domain |
Step 6 — Test your automation
After mapping the required fields, click Save & Send Test Request in Pabbly.
Open your Google Sheet and check the results. A new row should appear containing the article data captured from WPAutoBlog.
What else can you automate?
Google Sheets is only one example. Once Pabbly receives your WPAutoBlog article data, you can use it to build many different workflows depending on the apps and actions available in your Pabbly account.
- Article published → Add a row to Google Sheets.
- Article published → Create a page in Notion.
- Article published → Create a Google Doc.
- Article published → Send a notification.
- Article published → Pass article information to another supported app.
- Article published → Continue into a larger multi-step Pabbly workflow.
Team Access
WPAutoBlog Team Access lets you invite other people to collaborate on your WPAutoBlog account while keeping sensitive account and billing settings under the owner's control.
Getting started
Activate Team Access
Log in to WPAutoBlog and open Teams from the navigation. If Team Access is not already enabled, activate it there. Team Access is a $199 one-time purchase for up to 3 additional members.
Name your workspace
Open the Teams page and update the Workspace Name. Invited members will see this name when selecting the Team workspace.
Invite team members
On the Teams page, enter a member's email address and send the invitation. Pending invitations reserve an available member seat. The owner does not consume a seat, and you can invite up to 3 additional members.
Accept the invitation
Existing WPAutoBlog users can accept with their existing account. New users can create an account through the invitation flow. Once accepted, the Team becomes available from Account Settings.
Switch accounts and workspaces
From Account Settings, members can switch between their Personal account and the Team workspaces they belong to. You can belong to more than one Team and can also own a Team while belonging to another one. An owner's Personal account already represents their own WPAutoBlog resources, so their own workspace is not shown as a separate switching option.
What can Team members do?
While working inside a Team workspace, members can use the owner's shared WPAutoBlog resources and existing connected WordPress websites for supported collaborative workflows.
| Feature | Owner | Team member |
|---|---|---|
| Use shared WPAutoBlog resources | Yes | Yes |
| Use connected WordPress sites | Yes | Yes |
| Add/connect WordPress sites | Yes | No |
| Delete/disconnect websites | Yes | No |
| Manage Team members | Yes | No |
| Rename workspace | Yes | No |
| Change Pabbly webhook | Yes | No |
| Change API keys | Yes | No |
| Manage billing or plan | Yes | No |
WordPress websites and Team members
Team members can use WordPress websites that the owner has already connected to the Team owner's WPAutoBlog account. For security and resource control, Team members cannot add or connect a new WordPress website, or delete or disconnect an existing website. Only the owner can manage WordPress connections.
Private account settings
Team membership does not provide access to sensitive owner account settings. Team members cannot manage owner-level settings such as:
- API keys
- Pabbly webhook URL
- Billing, subscription, or plan settings
- Team membership management
- Workspace name
- WordPress connection management
Managing Team access
The Team owner can:
- Revoke a pending invitation;
- Remove an existing member; and
- Rename the workspace.
After a member is removed, they can no longer access that Team workspace.
Team Access FAQ
Does a Team member need their own WPAutoBlog subscription?
No. When working inside a Team workspace, invited members use the Team owner's shared WPAutoBlog resources and limits. Their Personal account remains separate.
Does the Team owner count toward the 3-member limit?
No. Team Access supports up to 3 additional members. The owner does not consume a member seat.
Do pending invitations count toward the limit?
Yes. A pending, non-expired invitation reserves a member seat until it is accepted, revoked, or expires.
Can I belong to more than one Team?
Yes. Available Team workspaces can be selected from Account Settings.
Can I own a Team and also be a member of another Team?
Yes. Your own Team and memberships in other Teams are independent.
Can Team members add or remove WordPress websites?
No. Team members can use existing connected WordPress websites, but only the owner can add, connect, delete, or disconnect websites.
Can Team members see or change my API keys or Pabbly webhook?
No. Sensitive owner account settings remain restricted to the owner.
How do I switch back to my own account?
Go to Account Settings and select your Personal account from the Active Account selector.
Most common reasons for connection issues
Standard connections use WordPress Application Password authorization and require a publicly reachable WordPress REST API plus a user who can create posts.
Use Websites → Test Connection to check an existing connection without changing its saved credentials.
Use the Alternative Connector only when the standard authorization flow cannot be used, such as a custom WordPress admin setup; it requires the WPAutoBlog plugin.
I connected my site correctly, but posts don't appear
- Go to the Websites page.
- If it shows the green Connected badge, click Error Log.
-
If the error log is empty or shows
0, our server cannot reach:http://yoursite.com/wp-json/wp/v2/postsProceed with Solution A below.
If you see an authentication or permission error, reconnect the site and approve WPAutoBlog through the WordPress Application Password authorization screen. The authorized WordPress user must be allowed to create posts.
If your server or security layer strips the Authorization header, ask the host or security-plugin administrator to allow WordPress REST API authentication rather than installing an unrelated authentication plugin.
Solution A
- Go to Wordfence → All Options, enable WordPress application passwords, then click Save.
- Uncheck: Block IPs who send POST requests with blank User-Agent and Referer.
Plugins that can cause the same issue and may need their settings adjusted include:
Only posts scheduled after you connected your blog get synchronized. Posts created before connecting are available for testing, but they do not get synchronized to your blog.
Cloudflare
Cloudflare by itself does not require a special WPAutoBlog connector. The standard connection uses direct WordPress REST API requests with an Application Password.
If your Cloudflare, host firewall, or security plugin blocks those requests, allow the WordPress REST API and WPAutoBlog server IP 159.203.96.206, then use Websites → Test Connection.
Use the plugin-based Alternative Connector only when direct Application Password REST access cannot be used; it is not the default Cloudflare setup.
Wordfence
Activate application passwords in Wordfence:
- Go to Wordfence → All Options → Enable WordPress application passwords and click Save.
- Uncheck: Block IPs who send POST requests with blank User-Agent and Referer.
Wordfence & other security plugins
Some security plugins can prevent WPAutoBlog from connecting to or using your WordPress site.
Make sure application passwords and the WordPress REST API are enabled.
Also uncheck:
GoDaddy REST API problem
To permanently allow GoDaddy to access the WordPress REST API:
- Under Website Security and Backups, click the website you want to manage.
- Under Firewall, click Details.
- Click Settings.
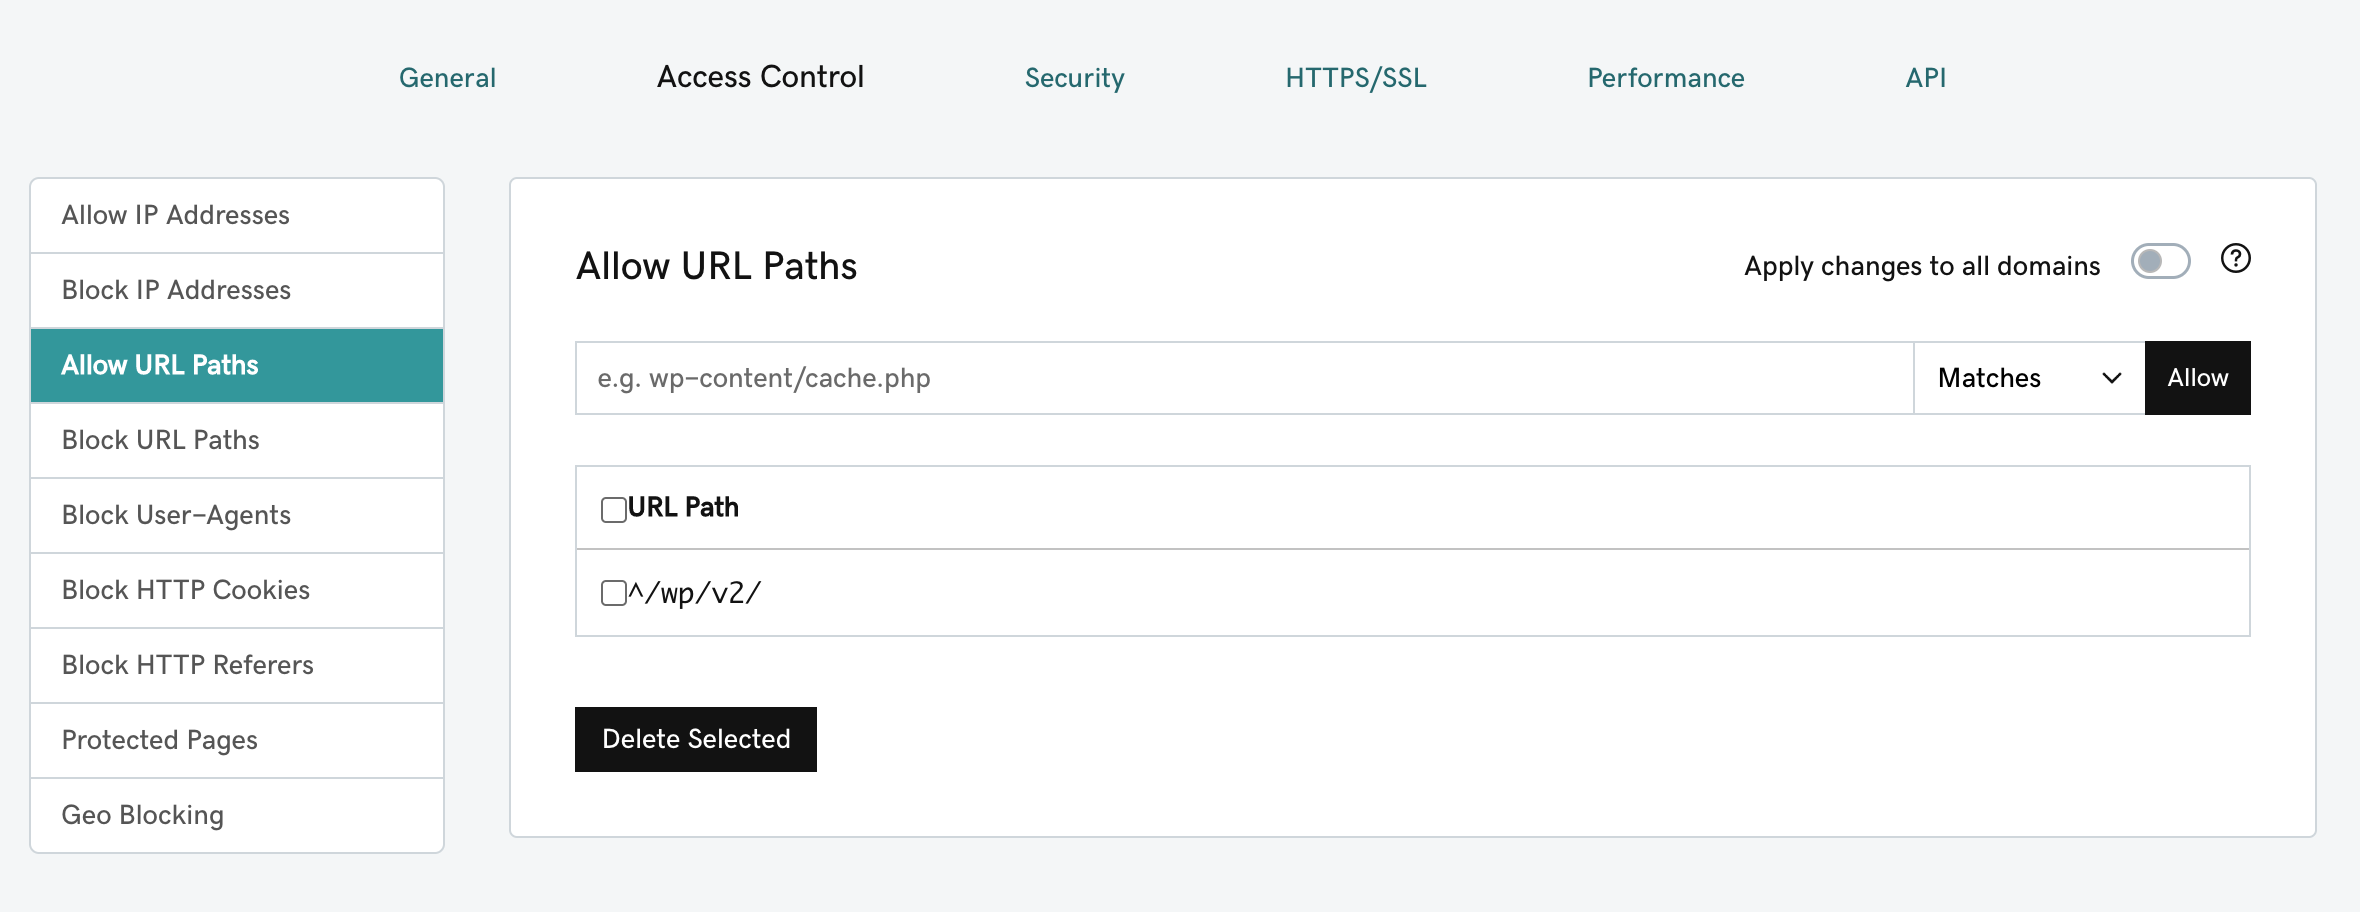
- Click Access Control.
- Click Allow URL Paths.
- Add
/wp/v2/to the input field and click Allow.
I was redirected to my WordPress admin homepage when trying to connect
Sometimes users get redirected to their WordPress admin homepage instead of the application approval page. Confirm that WordPress Application Passwords are available and that no security plugin disables them. For older WordPress installations, a compatible Application Passwords plugin may be required.
500 server error when trying to connect
Enter a WordPress site URL, wp-admin URL, or wp-json URL. Both root and subdirectory installs are supported.
https://example.com/blog
The content gets detected as AI. What can I do?
OpenAI shut down its own AI text detector because these detectors are not reliable: Source.
These tools can produce false positives. Even the Constitution of the United States has been identified as AI-generated by some detectors: Source 2.
If even major generative AI providers cannot accurately identify AI-written text, tools such as GPTZero cannot be treated as definitive proof.
Why are there no H3 tags?
The AI automatically decides whether an article should use H1/H2/H3 headings or only H1/H2 headings.
The content is intended to make sense naturally rather than follow exactly the same heading template every time. This provides more variation between articles.
Why does internal auto-linking not work?
WPAutoBlog scrapes your sitemap during the initial connection and then again every 24–48 hours.
If you start with an empty blog, your sitemap will also be empty, so there are no existing links available for auto-linking.
Image upload doesn't work
There are two common reasons why a featured image is not displayed:
- Check your WordPress Media Library. If the image was uploaded successfully, the issue is likely related to your theme settings.
- If the image is not in the Media Library, it is likely a permissions issue. Go to the WPAutoBlog Websites page and click Test Image Upload.
Special characters are displayed incorrectly
In wp-config.php, the database encoding should be utf8mb4.
Some hosts configure utf8 by default.
Change it to: